Maintaining an electric scooter involves more than simply charging the battery and ensuring the brakes function correctly. One of the most crucial skills for any scooter owner is understanding how to change the rear wheel while properly cleaning the components associated with it. This process not only extends the life of your vehicle but also ensures a safer and smoother ride. Whether you are dealing with a puncture, worn-out tyres, or simply performing routine maintenance, mastering this task will save you time and money in the long run.
Preparing your electric scooter and gathering essential tools
Assembling the Necessary Equipment for Wheel Replacement
Before you begin the process of changing your rear wheel, it is vital to gather all the necessary tools and equipment. Having everything at hand will make the job significantly easier and more efficient. You will need a set of screwdrivers, including both flathead and Phillips types, as well as a variety of wrenches that match the bolts on your scooter. A tyre lever is essential for removing and fitting tyres, particularly if you are dealing with pneumatic tyres that require careful handling. Additionally, consider having a cloth or brush ready for cleaning purposes, as well as lubricant for any moving parts that may need attention. If your scooter features a swappable battery system, you might also want to have a spare battery on hand in case the task takes longer than anticipated. Safety equipment such as gloves and eye protection is also advisable to prevent injuries during the maintenance work. With all these tools assembled, you will be ready to tackle the wheel replacement with confidence.
Positioning your scooter safely for maintenance work
Once you have gathered your tools, the next step is to position your scooter in a safe and stable manner. Find a flat, well-lit area where you can work comfortably without obstructions. If possible, use a stand or elevate the rear of the scooter to make access to the wheel easier. This will not only make the removal process more straightforward but also reduce strain on your back and knees. Ensure that the scooter is turned off and that the battery is disconnected to prevent any accidental activation during the maintenance work. If your scooter is equipped with a kickstand, make sure it is firmly in place to avoid any tipping. For models with a high max load capacity, such as the C4 1200W Electric Scooter, which can support up to 350 pounds, stability is particularly important. Taking these safety procedures seriously will help you avoid accidents and ensure that the maintenance process goes smoothly.
Dismantling and Removing the Rear Wheel Assembly
Loosening Fasteners and Detaching the Old Wheel
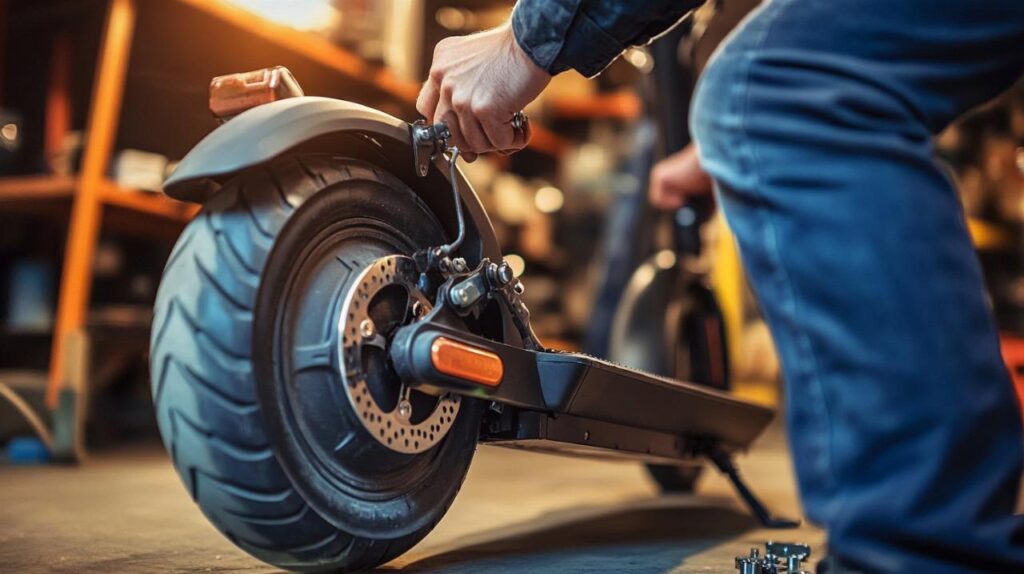
With your scooter securely positioned, you can now begin the process of removing the rear wheel. Start by identifying the fasteners that hold the wheel in place. These are typically bolts or screws located on either side of the wheel hub. Using the appropriate wrench or screwdriver, carefully loosen each fastener. It is important to work methodically, loosening each bolt a little at a time rather than removing one completely before moving to the next. This approach helps to evenly distribute any tension and reduces the risk of damaging the threads. Once all the fasteners are sufficiently loosened, you can remove them entirely and set them aside in a safe place where they will not be lost. With the fasteners removed, gently pull the wheel away from the axle. If the wheel seems stuck, a gentle wiggle or a light tap with a rubber mallet may help to free it. Be mindful of any cables or brake components that may be attached to the wheel assembly, as these will need to be carefully detached or manoeuvred around during the removal process.
Inspecting and cleaning wheel components during removal
As you remove the wheel, it is an ideal opportunity to inspect and clean the various components associated with it. This step is often overlooked, yet it is crucial for maintaining the overall health of your scooter. Begin by examining the bearings within the wheel hub. These small but vital parts can accumulate dirt and debris over time, leading to reduced performance and increased wear. Use a cloth or brush to remove any grime, and consider applying a small amount of lubricant to ensure smooth operation. Next, inspect the brake system, paying close attention to brake pads and discs for signs of wear or damage. If you notice any issues, now is the time to address them before reassembling the wheel. Additionally, examine the tyre itself, whether it is a pneumatic or solid type. Look for punctures, cracks, or excessive wear that may necessitate a replacement. Cleaning these components not only improves performance but also extends the lifespan of your scooter. By taking the time to perform these checks, you can catch potential problems early and avoid more costly repairs down the line.
Installing the New Wheel and Performing Quality Checks
Fitting the Replacement Tyre and Securing the Wheel Assembly
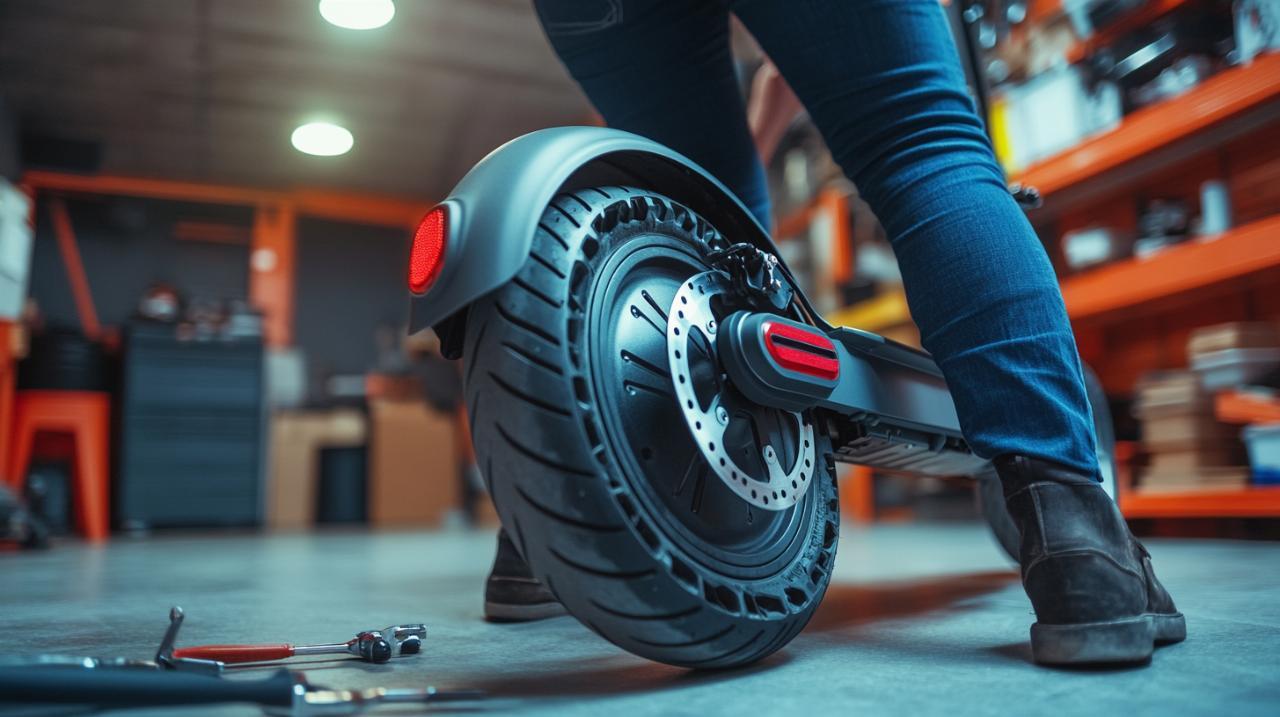
Once the old wheel has been removed and all components have been inspected and cleaned, you are ready to install the new wheel. If you are replacing a pneumatic tyre, you will need to fit the inner tube onto the rim before attaching it to the scooter. Use the tyre lever to carefully work the tyre onto the rim, ensuring that the inner tube is not pinched or twisted in the process. For solid tyres, the process is more straightforward, as they simply need to be aligned with the rim and secured. Once the tyre is properly fitted, slide the wheel back onto the axle, taking care to align it correctly with any brake components or cables. Begin securing the wheel by hand-threading the fasteners to avoid cross-threading. Once all the fasteners are in place, use your wrench or screwdriver to tighten them evenly. As with the removal process, it is important to tighten the fasteners gradually and in a balanced manner to ensure that the wheel is seated correctly and securely. Over-tightening can strip the threads or damage the components, so apply only the necessary amount of force.
Testing the Installation and Ensuring Proper Function
With the wheel securely in place, it is essential to perform a series of quality checks to ensure that the installation has been successful. Begin by visually inspecting the wheel to confirm that it is properly aligned and that all fasteners are tight. Give the wheel a spin to check for any wobbling or resistance, which could indicate that the wheel is not seated correctly or that the bearings need further attention. Next, test the brake system by engaging the brakes and observing whether they respond smoothly and effectively. If your scooter is equipped with a mobile app that provides diagnostic information, use it to check for any error messages or alerts related to the wheel or braking system. Once you are satisfied with the initial checks, take the scooter for a short test ride in a safe area. Pay attention to how it handles and listen for any unusual noises that could suggest a problem. If everything feels and sounds as it should, you can be confident that the wheel replacement has been completed successfully. Regular maintenance such as this not only ensures your safety but also maximises the performance and range of your scooter, whether it is a high-powered model like the GT54 bike with its peak 2000W motor and top speed of 40MPH or a more modest everyday electric scooter ideal for daily commutes.